How to Train with Heavy Grips Hand Grippers
Hand Gripper Beginner Program

By Clay Edgin - #1 Certified Gripper King and Grip Monster
In this article Iím going to show you some tips, tricks,
techniques, pictures, and videos to help you get the most out of your grippers
and develop stronger hands, as well as give you a sample training program based
off of my own program which I have been using with good results. Out of
all my grip toys, I like my grippers the most because I can take them anywhere
and I love to watch the expression on peopleís faces when they try them.
These are not your ordinary grippers that you can squeeze all day!
Why Train With Grippers?
If youíre an athlete, you need strong hands. Nearly every sport in the
world involves moving something with your hands or transferring your bodyís
power through the hands. Developing stronger lower arms will help you in
any athletic endeavor you aspire to do. Football, wrestling, baseball,
weightlifting, martial arts, and yes, even golf all rely on a high degree of
lower arm strength and working with grippers is a key element of that.
Letís get down to business.
The Set
ìSettingî the gripper basically means that you are using
your other hand to help position the gripper in your hand. You are also
closing the gripper far enough so that you can wrap your pinky around the
handle and put it in a good position to close the gripper. It may take
you a few days or a few weeks to completely grasp the ìfeelî of setting the
gripper but once you do you will reap the benefits immediately. You will
soon find a ësweet spotí in your palm for the handle to rest. That
allows you to get the best possible leverage. When I set a gripper in my
right hand, I use my left thumb to press one gripper handle firmly into my
right palm, while at the same time using my left index finger to pull the other
handle closer so my pinky can wrap around it better. Despite having 8î
long hands, I have relatively short fingers and donít have an easy time closing
grippers without a set. See Figures 1 and 2 below, and Figure 3 of the
ìsetî gripper.
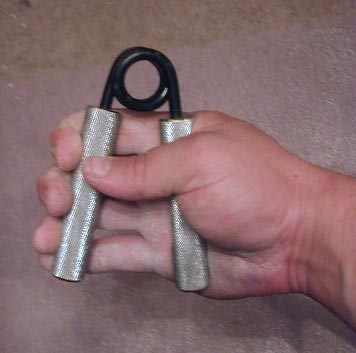
Figure 1
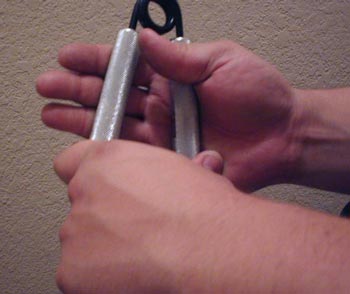
Figure 2

Figure 3
Under no circumstances would you want to set the gripper any further than
parallel, and in fact if you were interested in certifying on the HG300 , HG400, or HG500 you would only be allowed to set the gripper enough to get your hand
around it a little. That is, you donít want to use your other hand to
help you squeeze it so far that the handles are nearly parallel with each other
like in Figure 4. It makes the rest of ëthe closeí easier because you can
get some added leverage. Why not do it then, if itís easier?
Because it doesnít develop stronger hands, and didnít you buy the grippers to
develop stronger hands in the first place?
If you want to develop truly strong hands, work on using a very shallow set and
practicing ëno-setí closes. ëNo-setí means you donít use the other hand
to set the gripper at all and you squeeze the gripper completely closed using
one hand only. These types of squeezes are much tougher and will make your
hands strong. But if you donít have large hands, this can be difficult.
However, donít use hand size as an excuse for you not to use ëno-setí closes in
your training. If you can no-set close the HG100, then you have the hand
size to no-set close the HG150, 200, 250, and 300. All feats of grip
strength rely on hand strength, not hand size. One of the unique things
about Heavy Grips is that all the grippers have a standard handle spread of
2.5î, allowing more people to be able to close the gripper with a shallow set
or no set at all.
Figure 4
When I meet with someone new and interested in grip and they ask my advice on
the grippers, 9 times out of 10 the first thing I suggest they correct is their
pinky placement on the handle. As awkward as it sounds, having your pinky
halfway off the bottom of the handle puts your hand in a better leverage
position. You still want your pinky involved in the crush
and not slipping off the handle though.
The Squeeze
After the gripper is set, the other hand is taken away and you begin to crush
the handles together. There isnít much explanation necessary for this
part and the best advice I can give is squeeze hard! The closer the
handles get to touching, the more your pinky and ring finger come into
play.
Anyone familiar with the use of dynamic resistance in weight lifting, such as
using large rubber bands or chains to add additional tension on a barbell, will
recognize that gripper springs are also a form of dynamic resistance. The
idea behind using bands and chains is that it teaches you to lift the weight
explosively to blast through sticking points that you would normally
encounter. As such, a gripper should be closed as fast as possible.
If you donít explosively squeeze the handles together, you will not get nearly
as close to closing them than if you had crushed them quickly and will find
yourself at the same frustrating sticking point.
Inverted Closes
Because squeezing the gripper in a standard position with the spring pointing
up as shown above really works those last two fingers, if you want strong hands
you should make it a point to include some ëinverted closesí to
focus on strengthening your index and middle fingers. Inverted just
means that the spring is pointing towards the ground. Setting a gripper
in the inverted position is a little more tricky than a standard position, but
take your time with it. No-set inverted gripper squeezes are also
great. Figures 5 and 6 show an inverted set and close.
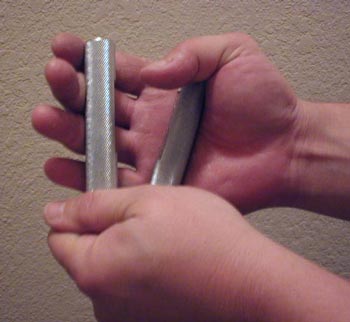
Figure 5
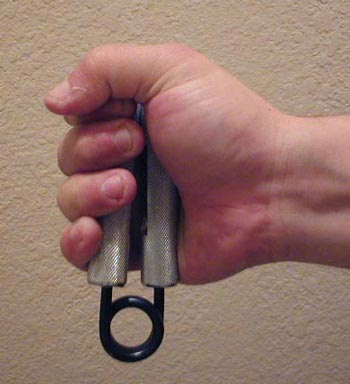
Figure 6
Training
The
hands have a remarkable ability to recover quickly from the workout you give
them. I would recommend working with grippers no more than 2-3 times a
week if you are a beginner and then start to increase the frequency and volume
of your workouts over the course of several weeks. Below is a sample
training program for people who are trying to close the Heavy Grip 150, which
we will call the goal gripper. You can adjust this program
according to what your goal gripper is.
Warm-up:
6-8
repetitions on a very easy gripper each hand. I do this just to get a
little blood flowing to my hands. Those cheap store bought grippers work
fine for this.
6-8
repetitions with a very easy gripper each hand, but this time do it inverted.
HG100
Closes ñ 3 each hand, and 3 attempts inverted
Workout:
HG150
(goal gripper) Attempts ñ 5 each hand, and 5 inverted too
Negatives*
with HG200 ñ 3 negatives each hand, holding for 3-5 seconds each time
*Negatives
are done by cheating the gripper closed with 2 hands and then slowly opening
the gripper using only 1 hand.
Cool-down:
Contrast
baths ñ one bucket filled with hot water and another with cold water. Put
your hands into one bucket, slowly stretching and flexing your fingers and then
put them into the other bucket and do the same. Repeat several
times.
Routine
Notes and Progression
If
you are feeling ìoffî and not up to 100% strength, you can reduce the number of
squeezes during the warm-up so the bulk of your energy and strength go into the
goal gripper squeezes. I take no less than a minute in between gripper
squeezes so my hands can recover a bit. Keep to this program 3 times a
week for 3 weeks, then add in another workout so you are using the grippers 4
times a week. The next week, add in another day per week. From
there, use your best judgment as to how often you should train. If you
are an advanced grip enthusiast, you may choose to work your grip every day for
a week and then take a week off. Iíve done this many times after slowly
working back up in volume and it has helped a lot. As you increase the
number of workouts you do per week, also increase the number (volume) of
gripper squeezes.
Closing your goal gripper can be very rewarding and can take your hand strength
to new levels. As you get more experienced, donít be afraid to experiment
with any ideas you have on training. And if you get stuck at that last
1/8î and arenít making any noticeable progress, take a week off and then close
that sucker!

The Heavy Grips hand gripper series was developed for athletes who want to take the training of their grip strength to the next level.
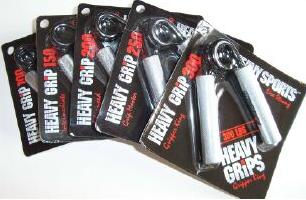
These high-quality aluminum-handled handgrippers are made in 50lb increments from 100lbs to 300lbs so that you can train your grip similar to training any other bodypart-- by increasing resistance.
If you want to develop serious hand strength for a sport, or just want to impress your friends, than the Heavy Grips hand grippers is the only choice for you!
These are the perfect hand grippers for Arm Wrestlers, Powerlifters, Strongmen, Bodybuilders, Rock Climbers, Gymnasts and anyone else who wants to develop a strong crushing grip and massive wrists and forearms.
Click Here to get your very own set of Heavy Hand Grippers.
|